![White logo TopLeft_240x78.png]](https://help.topleft.team/hs-fs/hubfs/White%20logo%20TopLeft_240x78.png?height=50&name=White%20logo%20TopLeft_240x78.png)

Time required: 2-4 hours
This week you'll create a TopLeft Kanban board for your Kanban workflow and ensure the tickets in the workflow are accurate. You may also set up a new ConnectWise PSA service board for the workflow.
Optional- make a dedicated ConnectWise PSA service board for the workflow
Consider making a new ConnectWise service board for the Kanban workflow. Here are some reasons to make a new service board:
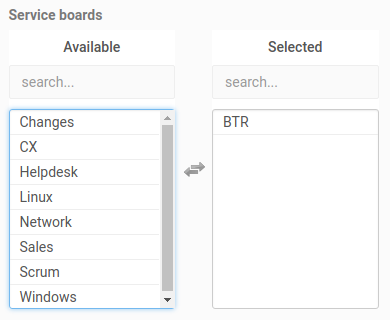
- You can easily identify the tickets for the workflow in ConnectWise
- You can avoid changing statuses for service boards used for other workflows, limiting impact on the rest of the organization
- You can easily show the tickets in Kanban by selecting the new ConnectWise service board in the board filter.
Create the ConnectWise service board. Configure the statuses you identified last week.
ConnectWise documentation for status boards
Because changes to ConnectWise boards and statuses are infrequent, TopLeft doesn't synchronize these changes right away. There will be a delay between making the change in ConnectWise and seeing the change in TopLeft. Or you can force a sync.
Create the TopLeft Kanban board
Create the TopLeft Kanban board for the workflow. For instructions, see Manage Kanban Boards.
Keep it simple. You can always make it more sophisticated later. We recommend:
- Don't use swimlanes yet.
- To filter the tickets for the workflow, either:
- If you set up a dedicated ConnectWise service board for the workflow, set the service board filter
- If you did not set up a dedicated service board, then use either the team filter or the resources filter. For the resources filter, select the members who are involved with the workflow. Be aware that this will display all tickets for these members, not just the tickets for the Kanban workflow.
- Configure one column per status. It's possible to map multiple statuses to one column, but this shouldn't be necessary if you kept the statuses very simple.
- Configure columns ordered left-to-right as the ticket approaches completion. If you have a Blocked or Scheduled status, those columns should go to the left of In Progress. Ideally, a ticket will only ever move to the right. Moving to the left indicates that it hasn't been handled as efficiently as possible and there may be room for improvement.
- Don't include a Completed column. Tickets usually require a final note and time entry when closing, so closing is typically done in ConnectWise and not TopLeft.
Review the board and make changes as necessary. Pay special attention to the ticket filtering. If you see tickets that aren't part of the workflow, and you aren't using a dedicated ConnectWise service board, you may need to set up additional filters.
Ensure tickets on the board reflect reality and are the right size
The Kanban board should be usable now, but you don't have to begin using it this week. Keep in mind that the tickets aren't yet ranked in their columns. The tickets at the top of a column aren't necessarily more important than those at the bottom.
Review the tickets on the board to ensure the data is correct. You'll need accurate data for the next week's work.
Tickets should reflect reality
For each ticket, verify its fields are set accurately. Pay special attention to these fields:
- Status- for example, if the ticket is In Progress but is neglected, consider if it's actually blocked on something beyond the technician's control. Or if it's in Blocked, but the technician could work it if he or she had no more important tickets, then it's In Progress.
- Due date- if nobody actually looks at this, clear the field
- Budget- again, if nobody cares, clear this field
- Assigned members- ensure that tickets that have been started (In Progress, Scheduled, Blocked, etc.) have at least one assignee, and that each assignee is planning to do further work on the ticket. If a ticket has multiple assignees, but some have completed their part of the work, they should remove themselves. If a ticket has been started but has no member, assign one so that it can begin progressing to completion again.
Tickets are appropriately sized
For each ticket, ensure that its scope is appropriate.
If a ticket is too large, it:
- remains in progress a long time, preventing other work from starting
- reduces visibility of the work in Kanban
- is more difficult for multiple team members to work on
- is more likely to go back to a blocked or scheduled status instead of progressing straight through to completed
If a ticket is too small, it increases the administrative work of managing the ticket.
Notice that there's numerous disadvantages of large tickets and only one disadvantage of small tickets. When in doubt, make smaller tickets.
Here are some general rules for sizing tickets:
- a ticket should never take more than two full days at the very most
- ideally, a ticket should be able to be completed in a single uninterrupted session of work
- if the technician feels like he or she is handling tickets as a group, then they might have been too small.
Using a BTR workflow as an example, here are possible work items:
- Schedule BTR with customer
- Prepare the BTR - review systems and reports
- Perform the BTR with the customer
- Complete follow-up tasks
Notice each of these tickets can progress independently through the statuses.
You now have an accurate view of the queued and in-progress tickets in your workflow. Doesn't that feel great? Next week you'll choose members for two important Kanban roles so they can begin planning and monitoring the work.
Next up: Week 3